 Skip to content

Our easy, 2 minute ice-cream made in a blender is REFINED sugar-free and will blow you away with how delicious it is.
When you begin a plant based diet, you will naturally miss many of your favourite foods, ice-cream being one of the major cravings for most people.
And, if you’re doing the healthy, whole foods plant based diet, you definitely won’t want to be buying those sugary, shop bough ice-creams, whether they’re dairy free or not.
That’s why you will have your world rocked when you discover what we are about to share with you in this post -an ice-cream is that is so easy, 100% HEALTHY and totally customisable.
How Do I Make Ice-Cream In My Blender?
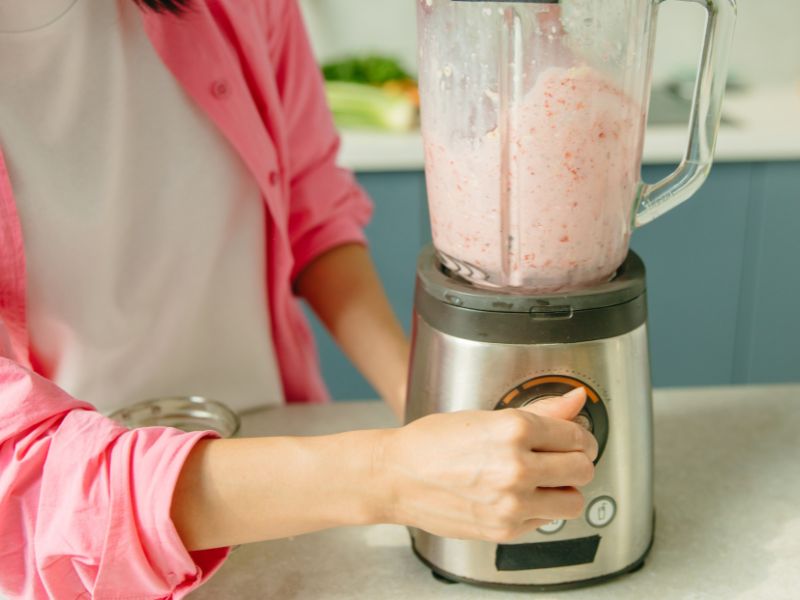
Making blender ice-cream is so simple, but there is also an art to it, so you will need to be sure you follow our directions in the below recipe as precisely as possible. if you don’t, you will end up with a smoothie bowl instead, which can be equally delicious, but definitely not an ice-cream texture.
The secret to this easy, 2 minute ice-cream is getting your ratios of ingredients correct. This means both your milk ratios and your banana to fruit ratios. Both of these things make a very big difference to your end result texture and will probably dictate whether you become a healthy ice-cream addict or you never bother again.
What’s so good about 2 minute ice-cream?
Firstly, this fantastic ice-cream contains 2-3 portions of your daily fruits and veggies in one utterly delicious hit. If not more if you top it with extra nuts, seeds, fruits, or our RAW homemade granola.
Secondly, homemade nice-cream is a great way to get healthy, plant based foods into both you and the kids, whilst all the time they think it’s a naughty treat 😉 They will not know the difference between this ice-cream and a shop bought version once you’ve mastered this skill.
This 2 minute ice-cream is by no means just for kids either. It’s a proper grown up treat too!

Customise Your 2 Minute Blender Ice-Cream!
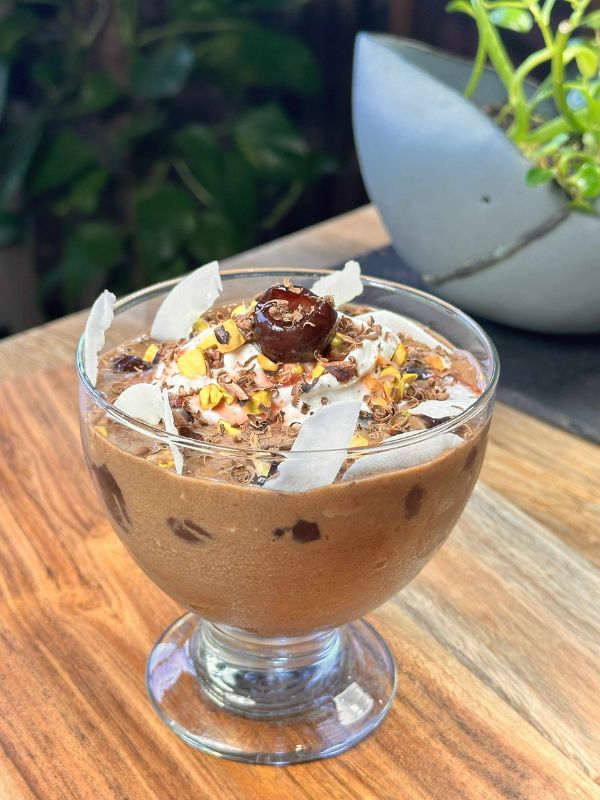
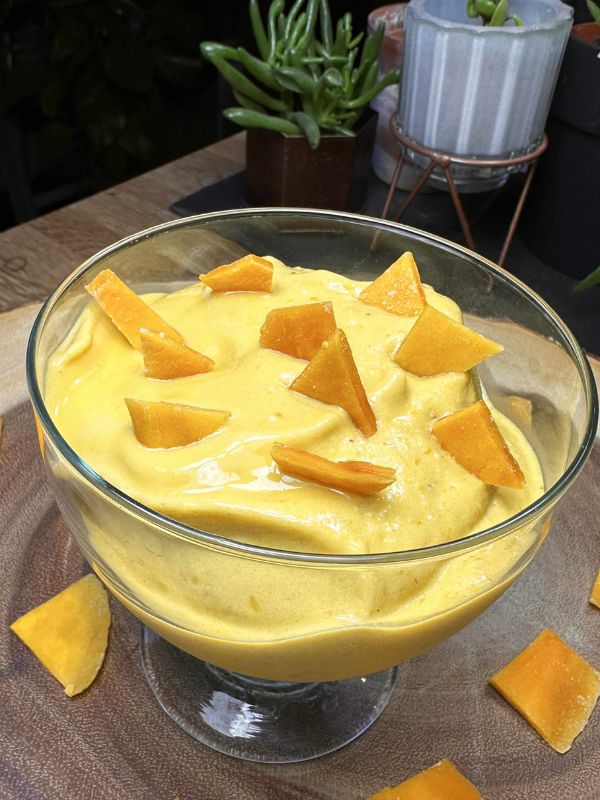
You will also find that you can customise these ice-cream bowls to suit your own tastes and needs. For instance, you can use ANY fruits you like for different flavours, Strawberry, blueberry, chocolate-cherry, mango, pineapple – it ALL works perfectly!
You can also customise the fluid base and make it creamier by using coconut cream, hemp, or oat milks.
If you want to eat homemade blender ice-cream every day as part of your healthy eating plan, then it’s a good idea keep them varied for a good array of different nutrients and so you don’t get bored (not that you ever could).
You can also enjoy this tasty, homemade ice-cream for breakfast, lunch, dinner, dessert, or just a snack. Anything goes when you start incorporating ice-cream and other raw and nutritious foods into your diet. You can eat them any time, for any meal, and you know you’re doing something good for your body.
Different Ways To Make Your Blender Ice-Cream
Here are some great ideas to alternate your ice-cream with different fruits and flavours, so you NEVER get bored.
It’s a good idea to always start off with a banana base if you want the creamiest ice-cream. If you don’t like banana, then why not try another high carb, creamy fruit like mango?
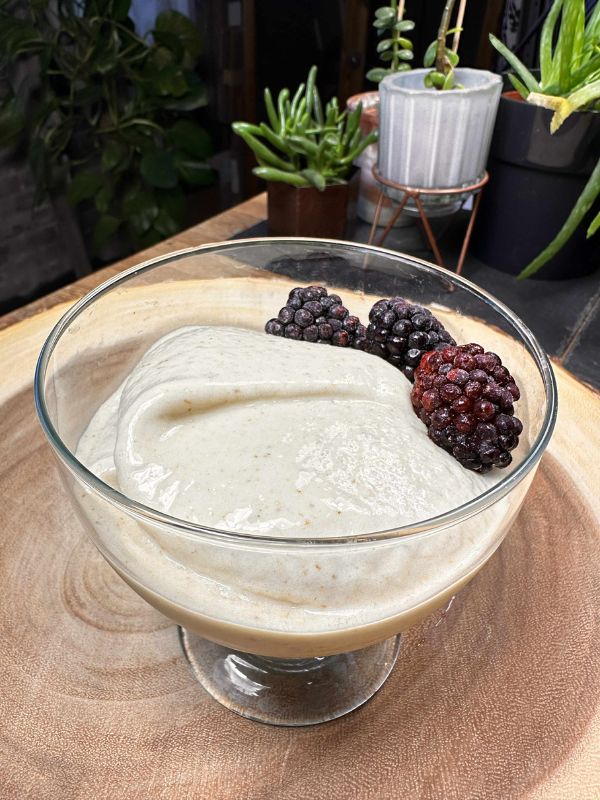
It’s best to use creamy fruits as you base for the right texture. However, you can use a plant based yogurt for this job too. Yoghurt works well when making a berry ice-cream, specifically.
The Best Ice-Cream Combinations
(We usually add 4 or 5 ice cubes to all of the below combinations to bulk up the end result up. But this is optional and you can make your ice-cream a lot creamier by not using ice at all).
- 2 parts frozen, sliced banana, 1 part frozen blueberries, plant milk.
- 2 parts frozen sliced banana, 1 part frozen strawberries, plant milk.
- 2 parts, frozen sliced banana, 1 part frozen cherries, plant milk.
- 2 parts, frozen, sliced bananas, 1 part raspberries, plant milk.
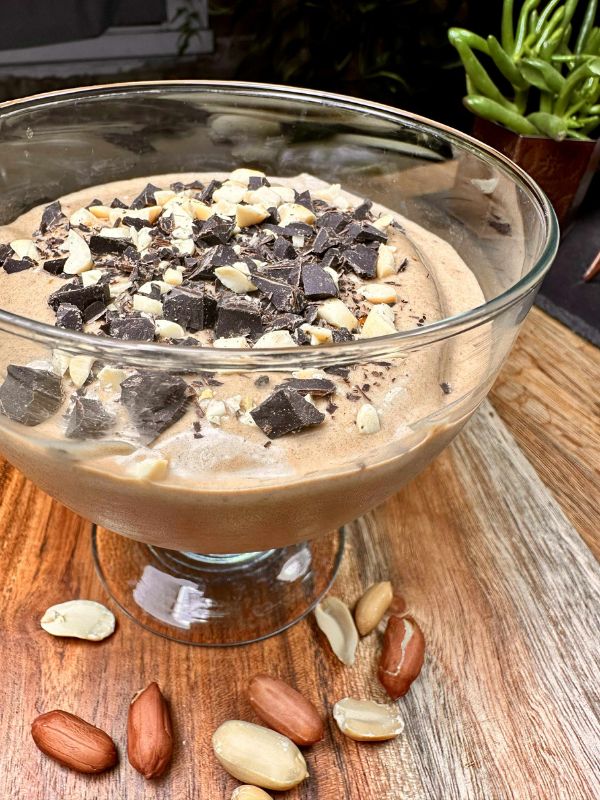
- 1 x large, frozen sliced banana, 1 tablespoon, smooth nut butter, 1 tablespoon cacao powder, vanilla, maple (optional), plant milk.
- 1 x large, frozen, sliced banana, 1/2 medium avocado, 1 tablespoon cacao powder, sweetener to taste, plant milk.
- 1 part frozen, sliced banana, 1 part frozen mango, pinch turmeric powder, coconut cream or milk.
- 1 part, frozen sliced banana, 1 part frozen pineapple, coconut milk or cream.
- Just banana and plant milk.
- Banana with superfoods such a acai berry, amla, maca, carob or lacuma powder.
- You can also make your ice-cream with a good quality protein powder to make it more nutritious and more of a meal. In fact, you will likely wish to do this if you are using your ice-cream as a meal replacement. We cannot stress enough that you should only use the healthiest, whole foods protein supplements for this, otherwise they will contain bulking agents.

Toppings For Your Ice-Cream
To make you ice-cream more of a meal, feel free to top it will lots of nutritious and filling toppings. It’s good to keep anything refined to a minimum to keep the benefits of your homemade ice-cream.
Potential topping ideas include:-
- Chopped, dark chocolate
- Chopped nuts such as almonds, walnuts, Brazil nuts, peanuts
- Seeds such as chia, flax, sunflower, hemp and pumpkin
- Desiccated coconut
- Fresh fruits
- Homemade, RAW granola
What Milk Do I Use In My Homemade Ice-Cream?
We have discovered that the best milk to use in this ice-cream that binds well is soy milk. The higher protein content of soy milk not only makes your ice-cream more filling, but also seems to help it bind and blend to a more fluffier texture.
Some shop bought milks tend work better than others, but you will need to experiment for yourself.
Homemade milks that work well are hemp and oat because you can make them as creamy as you desire.
You want you ice-cream texture to be smooth and creamy, definitely not grainy or icy. Using the wrong milk can have this affect; as can using too much milk or the wrong ratios of banana and ice-cubes etc.
These potential issues are why we encourage you to copy this recipe as close as possible.
Easy, 2 Minute Ice-Cream Made In A Blender – Sugar Free!
- High speed blender
- Chopping board
- Chopping knife
- 1 large or 1.5 medium sized very ripe, frozen bananas (You MUST freeze your bananas in advance. It is always best to slice, then freeze in a plastic container.)
- 1/2 cup frozen strawberries, raspberries, blueberry, pineapple or cherries. (OR 1 T of smooth, nut butter if you would like a non fruity version. If making with nut butter, then you can add 3-4 ice-cubes as it will hold well and make more.)
- Roughly 50ml plant milk (Soy milks tend to blend better because they are higher protein. You want a smooth blend, not a grainy or icy texture. You may have to experiment with your milks.)
- Maple or other sweetener (Optional. If your bananas are very ripe when you freeze them then you should not need extra sweetener.)
- You can add cacao powder too. Goes especially well with the peanut butter or the cherry version.
- Toppings of choice (Potential topping choices are chocolate chips, desiccated coconut, fresh fruits, chopped nuts and seeds.)
-
Be sure to chop and freeze your bananas before-hand. Try to use very ripe banana if you like your ice-cream sweet and gloopy textured. If not, you may need some sweetener, but very ripe bananas work best for this ice-cream.
You can freeze your chopped banana in a Tupperware or plastic container and poke it out with a blunt knife.
- Prepare your optional toppings before you begin your ice-cream making. Chop chocolate, nuts, seeds etc on a chopping board ready to add to the finished result.
-
Add about 1.5 inches of plant milk to your blender to begin with. You can always add more as you go, but try a little amount for your first attempt as you want to keep this an ice-cream texture and not a smoothie.
Some blenders take less milk than others to make your ice-cream, depending on their brand and powder.
- Put the rest of your ingredient ON TOP of your milk. Do not put your other ingredients in first because they may stick to the bottom.
-
Now whizz on full power for 30 seconds. You need to count the 30 seconds AFTER you get a full spin going. This amount of time is what makes your ice-cream as creamy as it can be, whilst still being virtually fat free.
If you cannot get a spin going straight away, take off, undo and add a dash more milk, then start spinning again. Once you have put the blender blade back on you can bang all the ingredients down to the blade on a tea towel. This helps you to get the spin going.
DO NOT let your blender spin for any length of time if it isn't blending properly or you may burn out your blender motor. You have to have a proper spin going so you don't risk this.
Always stop and gently bang down, or add more milk, if you can't get a spin going.
-
Once you have blended properly for 25-30 seconds you are ready to serve.
If adding toppings, it's good to serve in a breakfast bowl so you can flatten it down like a smoothie bowl and sprinkle your toppings all over.
- Eat immediately. Do not be tempted to freeze this ice-cream because it doesn’t work and goes rock hard and icy.
Thanks for visiting ZestForever today.
We value your support of our website and would love for you to share our recipes with your friends via your social media channels.
Let’s bring about a plant based revolution!
Pingback: How To Make Delicious, Fried & Caramelised Plantain