 Skip to content

Remember those delicious peanut butter cookies you ate as a kid; the ones you dunked in milk? They truly were epic and so moreish you had a hard time stopping eating them. But, they were not healthy to say the least and it definitely wasn’t optimal to gorge yourself on them like we did.
Fast forward to 2025 and we’re all making our own whole foods plant based versions that taste every bit as good (if not better) than those fat and sugar laden versions, and without the guilt tag.
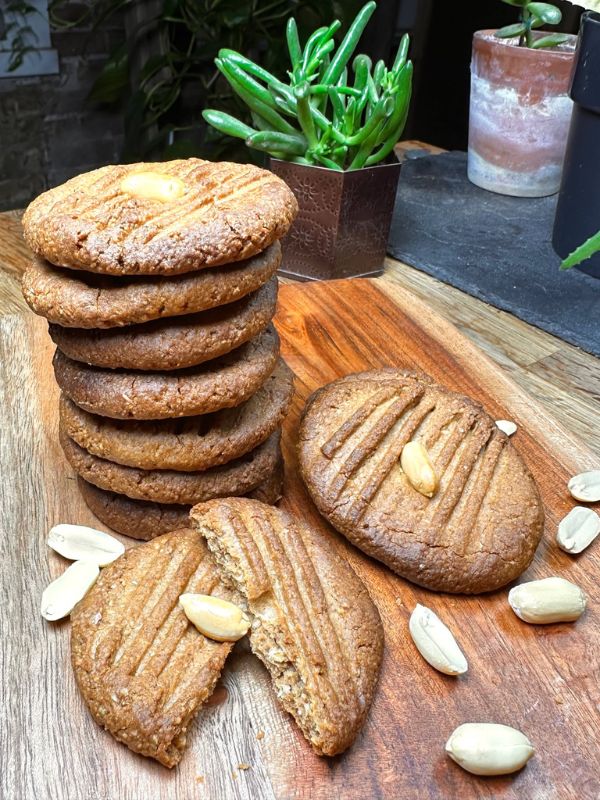
These 3 ingredient, peanut butter cookies are very easy to make and will blow you away with their delicious, peanut buttery crumbliness. Go ahead and try them for yourself if you don’t believe us.
What’s So Good About Peanut Butter Cookies?
1. Just 3 ingredients
For starters, these cookies are made from just three main ingredients. Yes, you heard that right! Three simple, store cupboard ingredients means you could probably go ahead and make these 100% plant based cookies right now if you fancy a treat.
2. Healthy whole foods
We all know the benefits of eating less refined sugars and oils and eating more whole foods, right? Well, these peanut butter cookies are made from only a few simple and nutritious ingredients of oat flour, peanut butter, and a little maple syrup for sweetness.
Making yourself whole foods desserts, cookies, and other treats means you need never miss out on any of your favourite foods. Instead you simply swap them for their healthier counterparts, of which the Internet has many ideas and recipes to indulge you.
3. Easy to make
These cookies are so simple to make, and they are great for getting the kids into baking and teaching them about how to make food more nutritious.
You’ll have no issues knocking up a batch of these whole foods, peanut butter cookies ready to eat very quickly. The whole process takes less than 30 minutes!
The only part you’ll need to pay particular attention to is in the actual baking itself. Ovens very and these bad boys burn up fast, so vigilance is crucial.
4. Very versatile
These cookies are versatile in the respect that you can change up those flavours if you so wish. You can substitute some of your oat flour for cacao or carob if you prefer a chocolate cookie. Other ideas would be adding vanilla, coconut flakes, chopped nuts, chocolate chips, or dried fruits too.
5. Eat anytime
Peanut butter cookies are not just a treat, they’re an anytime, healthy snack that can double up as a meal replacement too.
Need a grab and go breakfast? Grab yourself a couple of these scrumptious cookies because they have healthy fats, slow release carbohydrates, and protein to help keep you fueled for the morning.
In fact, there’s no time that isn’t good for these cookies because they will keep your blood sugar stable until your next meal.

How To Make Peanut Butter Cookies
These cookies could not be simpler and require virtually zero baking or kitchen skills, making them great for beginners.
1. Make the oat flour
Making oat flour is so easy and can quite literally be made in seconds from regular oats in your high speed blender. It’s just a case of throwing the required amount in the blender cup and whizzing on top speed until your oats are ground to a fine meal. No need to buy expensive shop-bought versions of oat flour when you can just do this.
2. Use whole foods peanut butter
Peanut butter’s can vary wildly in ingredients with some of the most unhealthy brands being full of palm oils and high fructose corn syrup. Do not use these types of nut butters in your healthy cookies, hence they will no longer be healthy. Most supermarkets these days will always have a 100% peanuts peanut butter with maybe a dash of salt (which is fine).
3. Combine ingredients
Mix all your chosen ingredients in one mixing bowl.
4. Lay on baking sheet
Now you will have to get your hands dirty a little, but that’s part of the fun. You will need to separate your mixture into 12 pieces or as close to that as you can get (weighing each one is an option if you want to be pedantic about it).
Roll each piece of cookie dough between the palm of your hands until it forms a tight ball with no cracks. Then gently flatten between your palms as much as you can without breaking your fledgling cookie.
Now lay on a pre-lined baking tray, then squash down a little more with a fork to make them thinner and to create a nice little pattern.
5. Bake
Bake in a pre-heated, 180C (356F) oven for 12 minutes. It’s crucial you check your cookies at the 8-10 minute mark to make sure they are not burning, as oven heats vary. You’re looking for a dark golden colour here.
Remove and gently lay on a wire cooling wrack until completely cold. Store in a an air-tight container for up to 10 days.

3 Ingredient, Peanut Butter Cookies (Very Easy!)
Equipment
- Mixing bowl
- Wooden spoon
- Large, flat baking tray
- Tin foil or parchment paper
Ingredients
- 1 cup smooth, peanut butter Go for 100% peanuts with only added salt (or better without salt). Check labels for anything other than these 2 ingredients, otherwise your cookies will not be as healthy.
- ¾ cup oat flour Whizz rolled oats in your high speed blender for about 10 seconds and you will have oat flour.
- 5 Tbsp maple syrup
- 1 tsp vanilla essence Optional
Instructions
- Set oven to 180C (350F)
- Line a large baking tray (or use two) with either tin foil.
- In a mixing bowl combine your peanut butter, maple syrup, and vanilla essence if using into a paste.
- Next add your oat flour slowly and mix as you go along. You may not need all the oat flour depending on how runny your peanut butter is, so play this by ear. You are looking for a very thick dough texture - thick enough for you to be able to roll it into balls between the palm of your hands.
- Once you have your consistency right, split your mix into 12 equal pieces, or as equal as you can get. TIP: To make this easier, press your mixture down in the mixing bowl so that it's pretty even on all sides, then take a knife and cut six slices into the mix. Now all you need to do is split each of those into two.
- Roll a piece of cookie dough between your palms into balls until they are smooth with no cracks. Once smooth, squash quite hard between your palms to flatten, but be gentle at the same time as you don't want to split your dough. A few cracks around the edges is fine though. Try and aim for your cookies to be about 1cm thick. Place on prepared baking sheet.
- Repeat with the rest of your dough pieces. Once you have all your cookies on your baking sheet, take a fork and press down once into the middle part of each cookie to create a nice pattern that looks great once your cookies are cooked.
- Bake for roughly 12 minutes about 3/4 way up your oven, but not on top shelf. You will need to check your cookies at around 10 minutes to make sure they are not burning. They do burn very easily, so be wary to keep checking. You're looking for a dark golden colour.
- Once baked, leave to cool slightly, then transfer to a wire cooling wrack. Cool completely, then transfer again into an air-tight container and refrigerate for up to 10 days.
Video

Thanks for visiting ZestForever today!
If you liked these outrageously delicious cookies, why not share the love with your friends by posting this recipe on your social media? We would really appreciate your support of this website 🙂
You may also love our giant spiced breakfast cookies too!