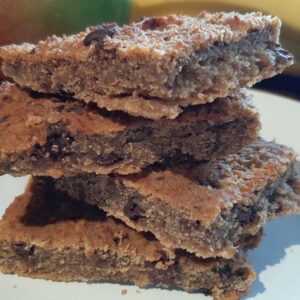
Homemade Peanut Butter Protein Bar Recipe
Plant based high protein bars with chickpeas and peanut butter
Equipment
- Mixing bowl
- Roughly 12" by 6" baking tray
- Wooden spoon
- Tin foil
Ingredients
- 8 pre-soaked dates
- ½ cup sugar-free peanut butter crunchy or smooth is fine
- 1 can of chickpeas skins removed
- ¼ cup buckwheat flour you can use oat, almond or coconut if you prefer
- 50 g dark chocolate of 85% cacao chopped roughly into small chunks or use chocolate chips
- 2 tbsp plant milk
- 1 tbsp maple syrup
- 1 tsp vanilla extract
- ¼ tsp bicarbonate of soda
- ½ tsp of baking powder
Instructions
- Pre-soak your dates for about 10-15 minutes before you begin, in a little water.
- Pre-heat oven to about 180 Degrees (350 F).
- Pre-line a baking tin (the size of roughly 8" by 10") with either parchment paper or tin foil. I used an 8" by 12", but didn't push my mix all the way to the end. You want your protein bar dough to be about 1/2 an inch thick when pressed down, for even cooking.
- Drain, rinse and de-skin you chickpeas. This may take about 5 minutes but it's crucial to do this in order to get a smoother texture, as those highly fibrous skins don't break down in your food processor very well. It's very easy to do, you just squish them gently between your fingertips and the skin will just slide off.
- Add all of the ingredients, apart from the chocolate (or any other add ins you're using) to your food processor. Be sure to remove all pips from your dates in this process.
- Blend your dough mix on high speed until as smooth as you can get it. You need this mix to be a very thick doughy texture, but you will have to keep scraping down the sides in order to achieve this. If you need to add a dash more plant milk to get a good spin going, then feel free. But, do keep this a very thick dough texture as much as possible.
- You probably won't get your mix super smooth, but that's fine. A little texture is good!
- Once you have got your dough ready to go, add your chocolate chips (or other add ins of your choice) and mix to combine.
- With a wooden spoon, scoop out your mix into your lined baking tray (about 12"by 6"inch) and press down firmly. This may be a little arduous because the mix will be so thick and claggy, but make sure you get an even press on it. You need it to be roughly 1/2 an inch thick all over. You don't need to necessarily take your mix to all the edges of the pan if it means it will end up too thin.
- Bake on the middle shelf of your oven for about 20 minutes.
- Remove from oven. Pull out your bake from the tin by its parchment paper or foil and lay on a flat, heat proof surface.
- Cut out 8 equal indentations. You don't need to cut all the way through, just most of the way. This will help stop your protein bars from crumbling when you cut them up properly later on.
- Pick the whole thing up again by the edges of the paper or foil, then put on a wire wrack to cool.
- Once completely cooled, remove your protein bars from the wrack and put back onto a flat surface. Cut all the way through, then gently pull off your parchment paper or foil. Be very careful with this process as they may still be a little delicate.
- Place in an air-tight container, and refrigerate to harden them up further.
- You can store these in your fridge for up to one week.
- You may wish to exchange the dark chocolate for dried fruit, chopped nuts, seeds or desiccated coconut. Or, anything else you wish to be creative with.
Video
Notes
APPROX 9G OF PROTEIN PER BAR